If you want to optimize Windows 10, take a few minutes to try out these tips to speed up your PC and make it less prone to performance and system issues.
Want Windows 10 to run faster? We’ve got help. In just a few minutes you can try out this baker’s dozen of tips; your machine will be zippier and less prone to performance and system issues.
1. Change your power settings
If you’re using Windows 10’s “Power saver” plan, you’re slowing down your PC. That plan reduces your PC’s performance in order to save energy. (Even desktop PCs typically have a “Power saver” plan.) Changing your power plan from “Power saver” to “High performance” or “Balanced” will give you an instant performance boost.
To do it, launch the Control Panel app, then select Hardware and Sound > Power Options. You’ll typically see two options: “Balanced (recommended)” and “Power saver.” (Depending on your make and model, you might see other plans here as well, including some branded by the manufacturer.) To see the “High performance” setting, click the down arrow by “Show additional plans.”
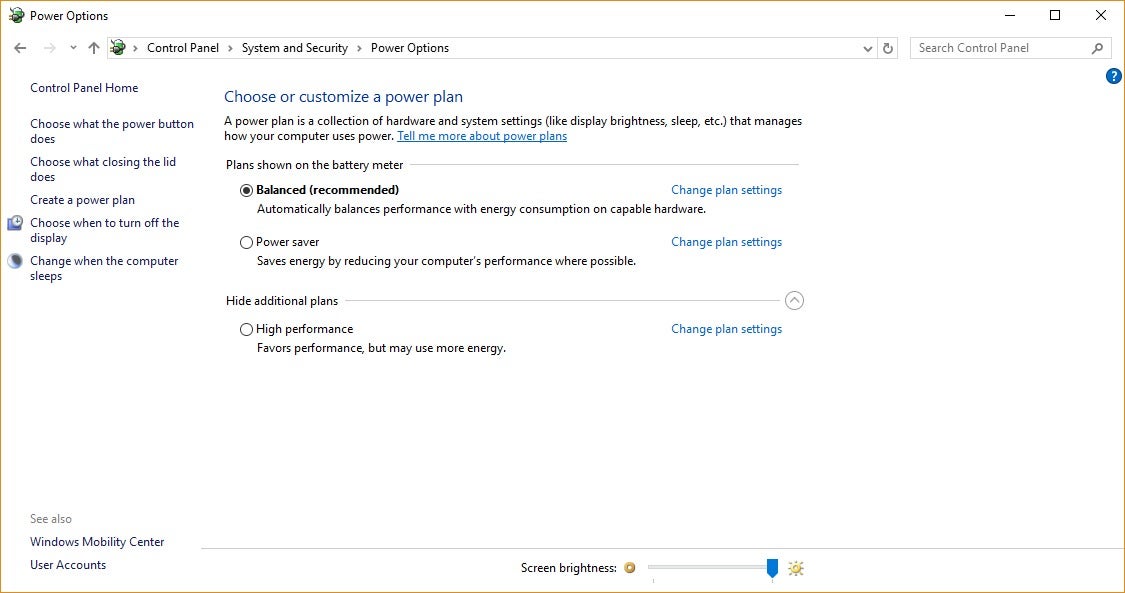
Change your power settings in Control Panel to give your PC a performance boost.
To change your power setting, simply choose the one you want, then exit Control Panel. “High performance” gives you the most oomph, but uses the most power; “Balanced” finds a happy medium between power use and better performance, and “Power saver” does everything it can to give you as much battery life as possible. Desktop users have no reason to choose “Power saver,” and even laptop users should consider the “Balanced” option when unplugged — and “High performance” when connected to a power source.
2. Disable programs that run on startup
One reason your Windows 10 PC may feel sluggish is that you’ve got too many programs running in the background — programs that you rarely or never use. Stop them from running, and your PC will run more smoothly.
Start by launching the Task Manager: Press Ctrl-Shift-Esc, right-click the lower-right corner of your screen and select Task Manager, or type task manager into the Windows 10 search box and press Enter. If the Task Manager launches as a compact app with no tabs, click “More details” at the bottom of your screen. The Task Manager will then appear in all of its full-tabbed glory. There’s plenty you can do with it, but we’re going to focus only on killing unnecessary programs that run at startup.
Click the Startup tab. You’ll see a list of the programs and services that launch when you start Windows. Included on the list is each program’s name as well as its publisher, whether it’s enabled to run on startup, and its “Startup impact,” which is how much it slows down Windows 10 when the system starts up.
To stop a program or service from launching at startup, right-click it and select “Disable.” This doesn’t disable the program entirely; it only prevents it from launching at startup — you can always run the application after launch. Also, if you later decide you want it to launch at startup, you can just return to this area of the Task Manager, right-click the application and select “Enable.”
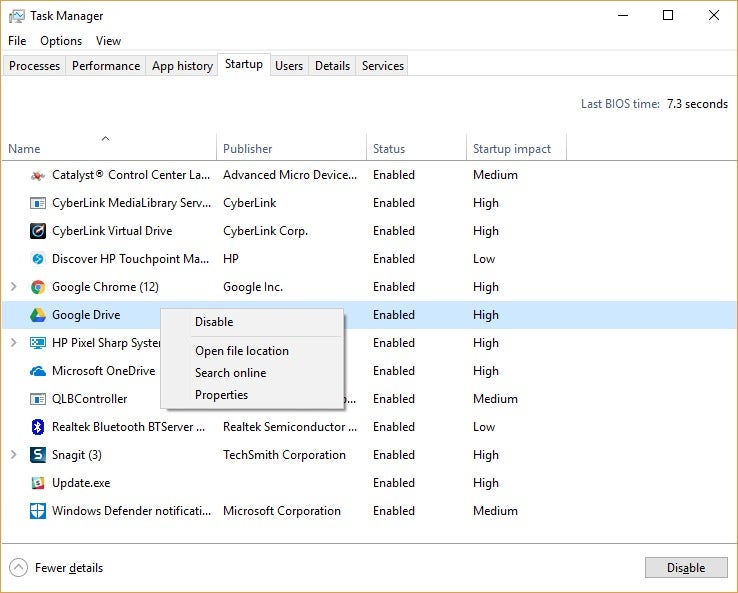
You can use the Task Manager to help get information about programs that launch at startup and disable any you don’t need.
Many of the programs and services that run on startup may be familiar to you, like OneDrive or Evernote Clipper. But you may not recognize many of them. (Anyone who immediately knows what “bzbui.exe” is, please raise your hand. No fair Googling it first.)
The Task Manager helps you get information about unfamiliar programs. Right-click an item and select “Properties” for more information about it, including its location on your hard disk, whether it has a digital signature, and other information such as the version number, the file size and the last time it was modified.
You can also right-click the item and select “Open file location.” That opens File Explorer and takes it to the folder where the file is located, which may give you another clue about the program’s purpose.
Finally, and most helpfully, you can select “Search online” after you right-click. Bing will then launch with links to sites with information about the program or service.
If you’re really nervous about one of the listed applications, you can go to a site run by Reason Software called Should I Block It? and search for the file name. You’ll usually find very solid information about the program or service.
Now that you’ve selected all the programs that you want to disable at startup, the next time you restart your computer, the system will be a lot less concerned with unnecessary programs.
3. Use ReadyBoost to speed up disk caching
Windows 10 regularly stores cached data on your hard disk, and then when it needs the data, fetches it from there. The time it takes to fetch cached data depends on the speed of your hard disk. If you have a traditional hard disk instead of an SSD, there’s a trick that can help speed up your cache: use Windows’ ReadyBoost feature. It tells Windows to cache data to a USB flash drive, which is faster than a hard disk. Fetching data from that speedier cache should speed up Windows.
First, plug a USB flash drive into one of your PC’s USB ports. The flash drive needs to support at least USB 2.0, and preferably USB 3 or faster. The faster your flash drive, the more of a speed boost you should see. Also, look for a flash drive that is at least double the size of your PC’s RAM for maximum performance.
After you plug in in the drive, open File Explorer and click “This PC.” Look for the flash drive. It may have an odd name, like UDISK 28X, or something even less-obvious. Right-click it, choose Properties and click the ReadyBoost tab.
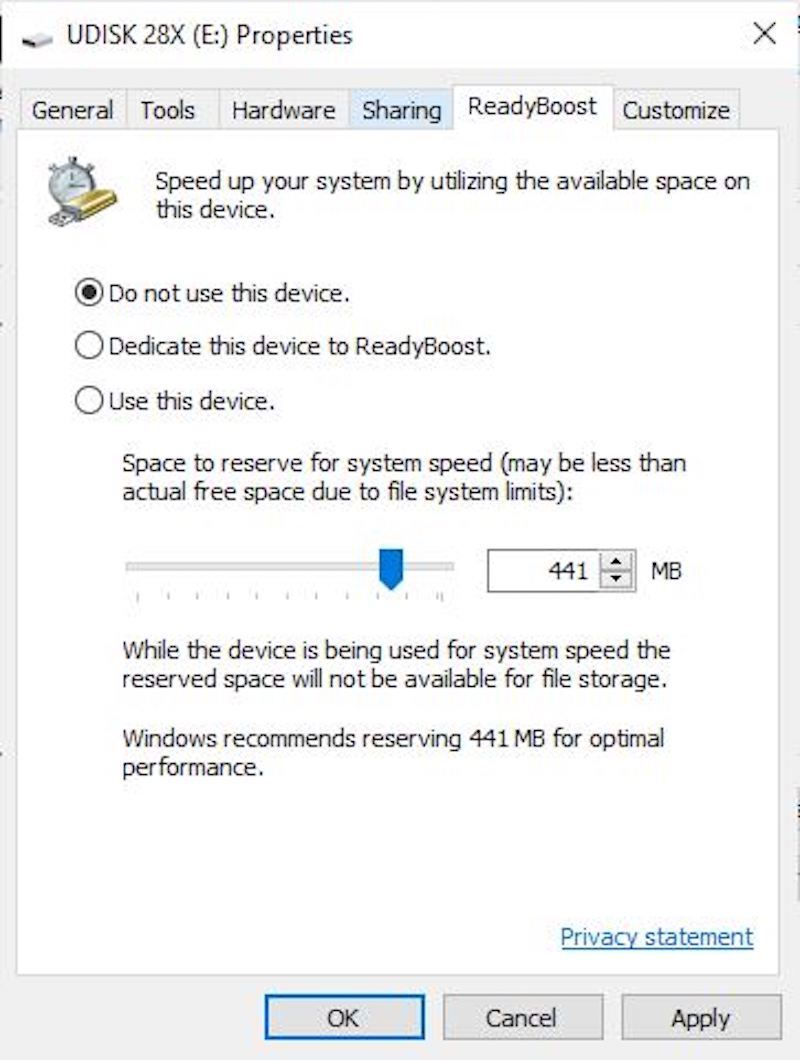
Turn on ReadyBoost from this screen to speed up your PC.
You’ll come to a screen that asks whether you want to use the flash drive as a cache and recommends a cache size. Leave the cache size as is or change it if you like. Then select “Dedicate this device to ReadyBoost” and click Apply and then click OK.
(Note that if you see the message, “This device cannot be used for ReadyBoost” when you click the ReadyBoost tab it means your flash drive doesn’t meet ReadyBoost’s minimum performance standards, so you’ll have to insert a new one.)
As you use your computer, ReadyBoost will start filling the cache with files, so you may notice an increase in disk activity. Depending on how much you use your PC, it can take a few days for your cache to fill and offer maximum improved performance. If you don’t see an increase in performance, try a flash disk with more capacity.
4. Shut off Windows tips and tricks
As you use your Windows 10 PC, Windows keeps an eye on what you’re doing and offers tips about things you might want to do with the operating system. In my experience, I’ve rarely if ever found these “tips” helpful. I also don’t like the privacy implications of Windows constantly taking a virtual look over my shoulder.
Windows watching what you’re doing and offering advice can also make your PC run more sluggishly. So if you want to speed things up, tell Windows to stop giving you advice. To do so, click the Start button, select the Settings icon and then go to System > Notifications & actions. Scroll down to the Notifications section and uncheck the box marked “Get tips, tricks, and suggestions as you use Windows.”
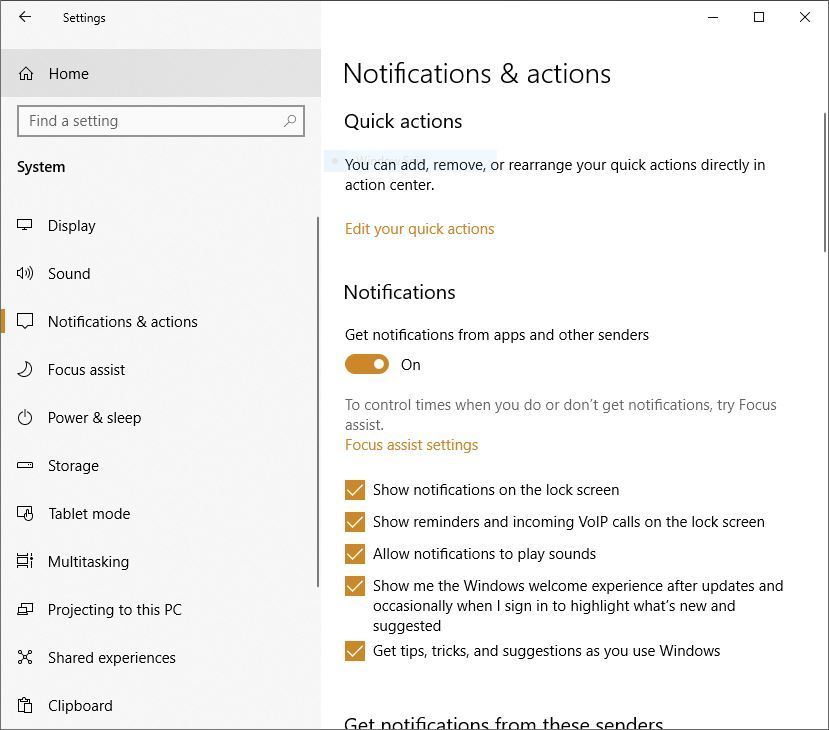
Turning off Windows’ suggestions for you should help things run more smoothly (and give you back a measure of privacy).
That’ll do the trick.
5. Stop OneDrive from syncing
Microsoft’s cloud-based OneDrive file storage, built into Windows 10, keeps files synced and up to date on all of your PCs. It’s also a useful backup tool so that if your PC or its hard disk dies, you still have all your files intact, waiting for you to restore them.
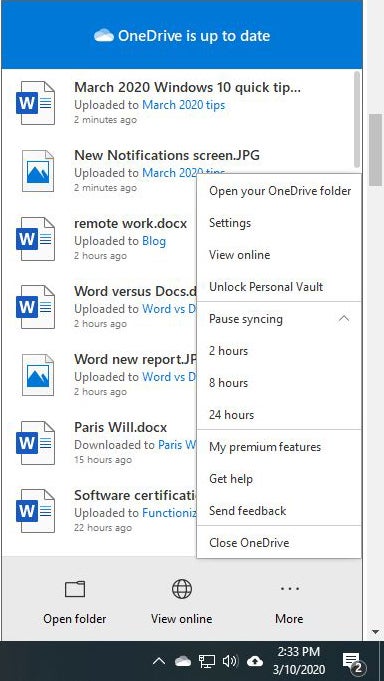
Here’s how to turn off OneDrive synching temporarily, to see if that boosts system performance.
It does this by constantly synching files between your PC and cloud storage — something that can also slow down your PC. That’s why one way to speed up your PC is to stop the syncing. Before you turn it off permanently, though, you’ll want to check whether it is actually slowing down your PC.
To do so, right-click the OneDrive icon (it looks like a cloud) in the notification area on the right side of the taskbar, then click the More button at the bottom of the screen. From the popup screen that appears, click “Pause syncing” and select either 2 hours, 8 hours or 24 hours, depending upon how long you want it paused. During that time, gauge whether you’re seeing a noticeable speed boost.
If so, and you decide you do indeed want to turn off syncing, right-click the OneDrive icon, and from the popup, select Settings > Account. Click “Unlink this PC,” and then from the screen that appears, click “Unlink account.” When you do that, you’ll still be able to save your files to your local OneDrive folder, but it won’t sync with the cloud.
If you find that OneDrive slows down your PC but prefer to keep using it, you can try to troubleshoot OneDrive problems. For info on how to do that, check out Microsoft’s “Fix OneDrive sync problems” page.